3 minute read
A couple of weeks ago, I received a request from a client. An attorney in her firm was leaving, a new one was joining, and clients needed to be notified of these changes. Was there a way to do this efficiently? Since the client was using Timeslips for their time and billing function, the answer was YES.
One of the more overlooked features of this program is the mail merge feature. This feature makes the most of the fact that it has the latest in client information, and that information can be easily inserted into boilerplate forms.
Here’s how this works:
Step 1: From the Reports menu, select Mail Merge –
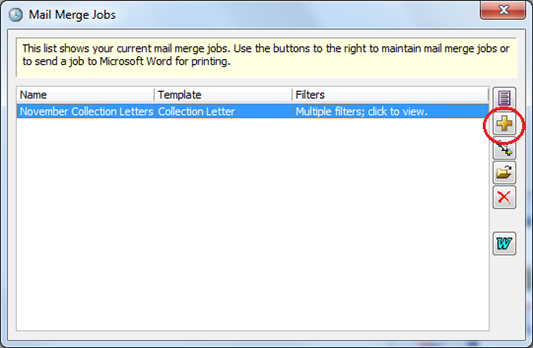
- The Mail Merge Jobs window appears
- Click on the New button to create a new mail merge template and optionally merge data with it
Step 2: Select the template to use OR create a new template.
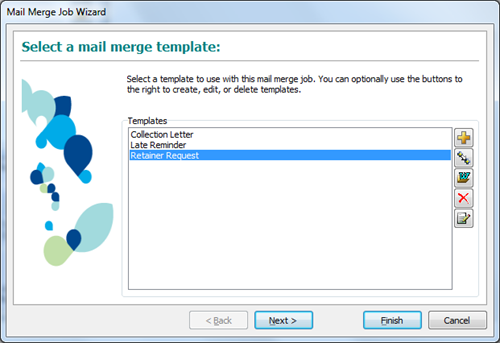
- Timeslips comes with three pre-determined templates for your use, with the option to create new ones for your collection.
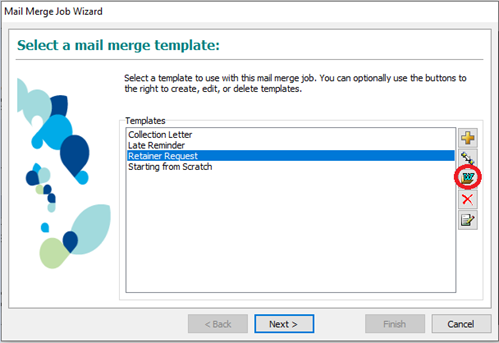
For today, we’ll highlight one (“Retainer Request”) and click on the Word icon on the right toolbar to open the template
- The Word document opens and shows both text and fields that can “read” information from Timeslips client records –
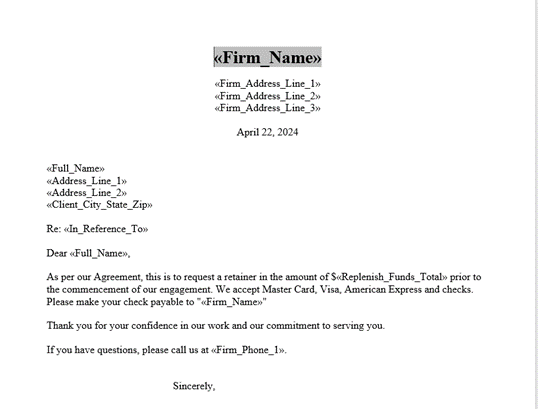
- The fields to read the firm’s name and address are at the top of the screen and can be used. If you want to use your firm’s letterhead instead, delete those fields and insert your letterhead.
- The fields to read the client’s name and address are also present. Leave those fields where they are.
- Delete the body of that template and enter the language you want to use for your correspondence.
- Click on Word’s Save command when you are finished and give the revised template a new name. Be sure to save the template in the same location, which is where Timeslips stores its mail merge templates.
- You will be returned to the window to Select a mail merge template. Now you can see the new addition to the template list. Highlight your new addition and click Next to continue.
Step 3: Choose the recipient(s)
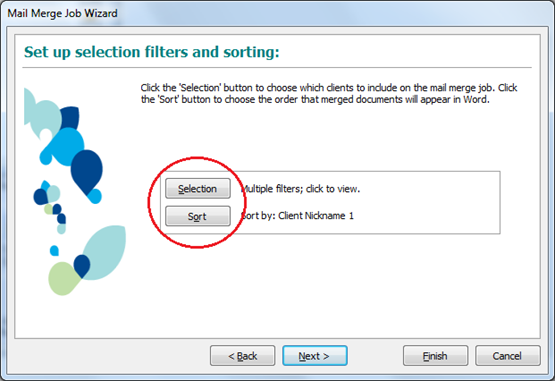
- The Set up Selection Filters and Sorting window appears
- Use the Selection button to choose the clients whose information is to be merged into the mail merge template
- You may optionally set up the Sort order for your mail merge
- Click Next to continue
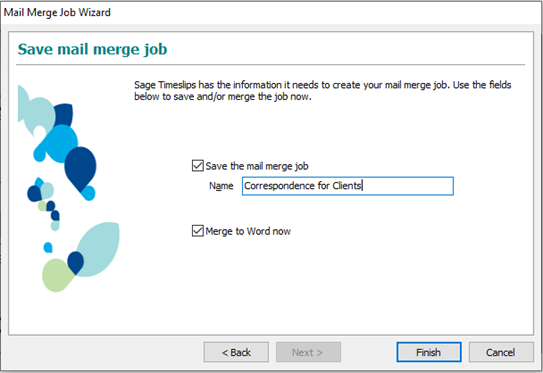
- The next and last screen appears
- Give the mail merge job a name
- Make sure the box to Merge to Word now is checked
- Click on the Finish button
- Congratulations! Microsoft Word will then launch and your document with merged data will appear.
Many programs contain hidden “gems” that can automate processes in your office. How many of them do you use to your advantage? Our team at Crosspointe can help you find these features to get the most out of your programs. Got questions? Call us at 877-375-2810 or write to us at [email protected].
Related Articles:

Dana Riel is President and Founder of Business Solutions, Inc., serving the Washington, D.C. metropolitan area since 1985. Her firm is the authorized training center for the region for Time Matters and PCLaw by PCLaw|Time Matters, PLLC; Timeslips and Sage 50 Accounting by Sage Software; and QuickBooks by Intuit Corporation. She also serves as a consultant for Caret Legal (formerly known as Zola Suite), CosmoLex, Soluno & TimeSolv. As a trainer, Dana has provided training services to organizations such as the DOD Defense Logistics Agency, Judge Advocate General’s Office (JAG)/Department of the Navy, University of the District of Columbia School of Law, U.S. Department of Commerce and the U.S. Department of Veterans Affairs, as well as with small‐ to mid‐size law firms in the Baltimore‐Washington D.C. area. In 2009, she participated in the series of day‐long seminars sponsored by the District of Columbia Bar Association Practice Management Section, titled “Basic Training: Learn About Running a Law Office”. Ms. Riel also served as an Adjunct Professor in Georgetown University’s Paralegal Studies Program, having taught the course, “Legal Ethics/Legal Technology” in 2009; and “Legal Technology” for the Spring and Summer Semesters of 2010. She presently serves on the Advisory Board for PCLaw|Time Matters, PLLC.